23. Spring Cloud Eureka
本节将通过Spring Cloud Netflix Eureka介绍客户端服务发现和负载平衡。
23.1. 服务发现
在典型的微服务体系结构中,我们有许多单独部署的小型应用程序,它们经常需要彼此通信。具体地说,当我们说客户服务时,我们指的是需要对其他终端服务进行REST调用的服务。
这种体系结构中的问题是客户端服务如何找到其所有最终服务。我们可以在某些属性文件中对主机名/端口进行硬编码,但这在云环境中并不总是可行。可能有任意数量的微服务,并且当数量不确定且它们的位置可能发生变化时,进行硬编码很费时间和资源。
因此,微服务中引入了服务发现组件,也就是注册中心,一般使用Eureka,也有其他的组件,Consul,zookeeper等。实际使用中,将微服务都注册到注册中心,注册中已经包含了微服务的ip等信息,这样,微服务之间互相调用时,就可以现在注册中心获取对应微服务的ip信息。这样就不用自己维护很多的配置文件了。
23.2. Eureka
Eureka是Netflix开源的服务发现组件,本身是一个基于REST的服务,包含Server和Client两部分,Spring Cloud将它集成在子项目Spring Cloud Netflix中。在微服务系统中,我们需要单独创建一个Eureka Server作为注册中心,其他的微服务就相当于客户端,注册到我们的注册中心中。
23.2.1. Eureka Server
实施Eureka Server进行服务注册非常简单:
- 将spring-cloud-starter-netflix-eureka-server添加到依赖项
- 通过使用@EnableEurekaServer注解在@SpringBootApplication中启用Eureka服务器
- 配置一些属性
下面,我们将逐步进行。
- 添加依赖项
1 2 3 4 5 6 7 8 9 | <dependency>
<groupId>org.springframework.boot</groupId>
<artifactId>spring-boot-starter-web</artifactId>
</dependency>
<dependency>
<groupId>org.springframework.cloud</groupId>
<artifactId>spring-cloud-starter-netflix-eureka-server</artifactId>
</dependency>
|
- 添加@EnableEurekaServer注解
1 2 3 4 5 6 7 8 9 10 11 12 13 14 15 | package com.docedit.springcloudconfigserver;
import org.springframework.boot.SpringApplication;
import org.springframework.boot.autoconfigure.SpringBootApplication;
import org.springframework.cloud.netflix.eureka.server.EnableEurekaServer;
@SpringBootApplication
@EnableEurekaServer
public class SpringCloudEurekaServerApplication {
public static void main(String[] args) {
SpringApplication.run(SpringCloudEurekaServerApplication.class, args);
}
}
|
- 配置属性
1 2 3 4 5 6 | server.port=8761
eureka.client.registerWithEureka=false
eureka.client.fetchRegistry=false
eureka.instance.hostname=localhost
eureka.client.serviceUrl.defaultZone=http://${eureka.instance.hostname}:${server.port}/eureka/
|
在这里,我们正在配置一个应用程序端口:Eureka服务器的默认端口是8761。 我们告诉内置的Eureka Client不要注册“自己”,因为我们的应用程序仅充当服务器。http://localhost:8761/eureka/是默认的url,因此defaultZone处的配置可以省略。
- 检查结果,打开浏览器,访问地址:http://localhost:8761 查看Eureka仪表板,稍后我们将在其中检查注册的实例。
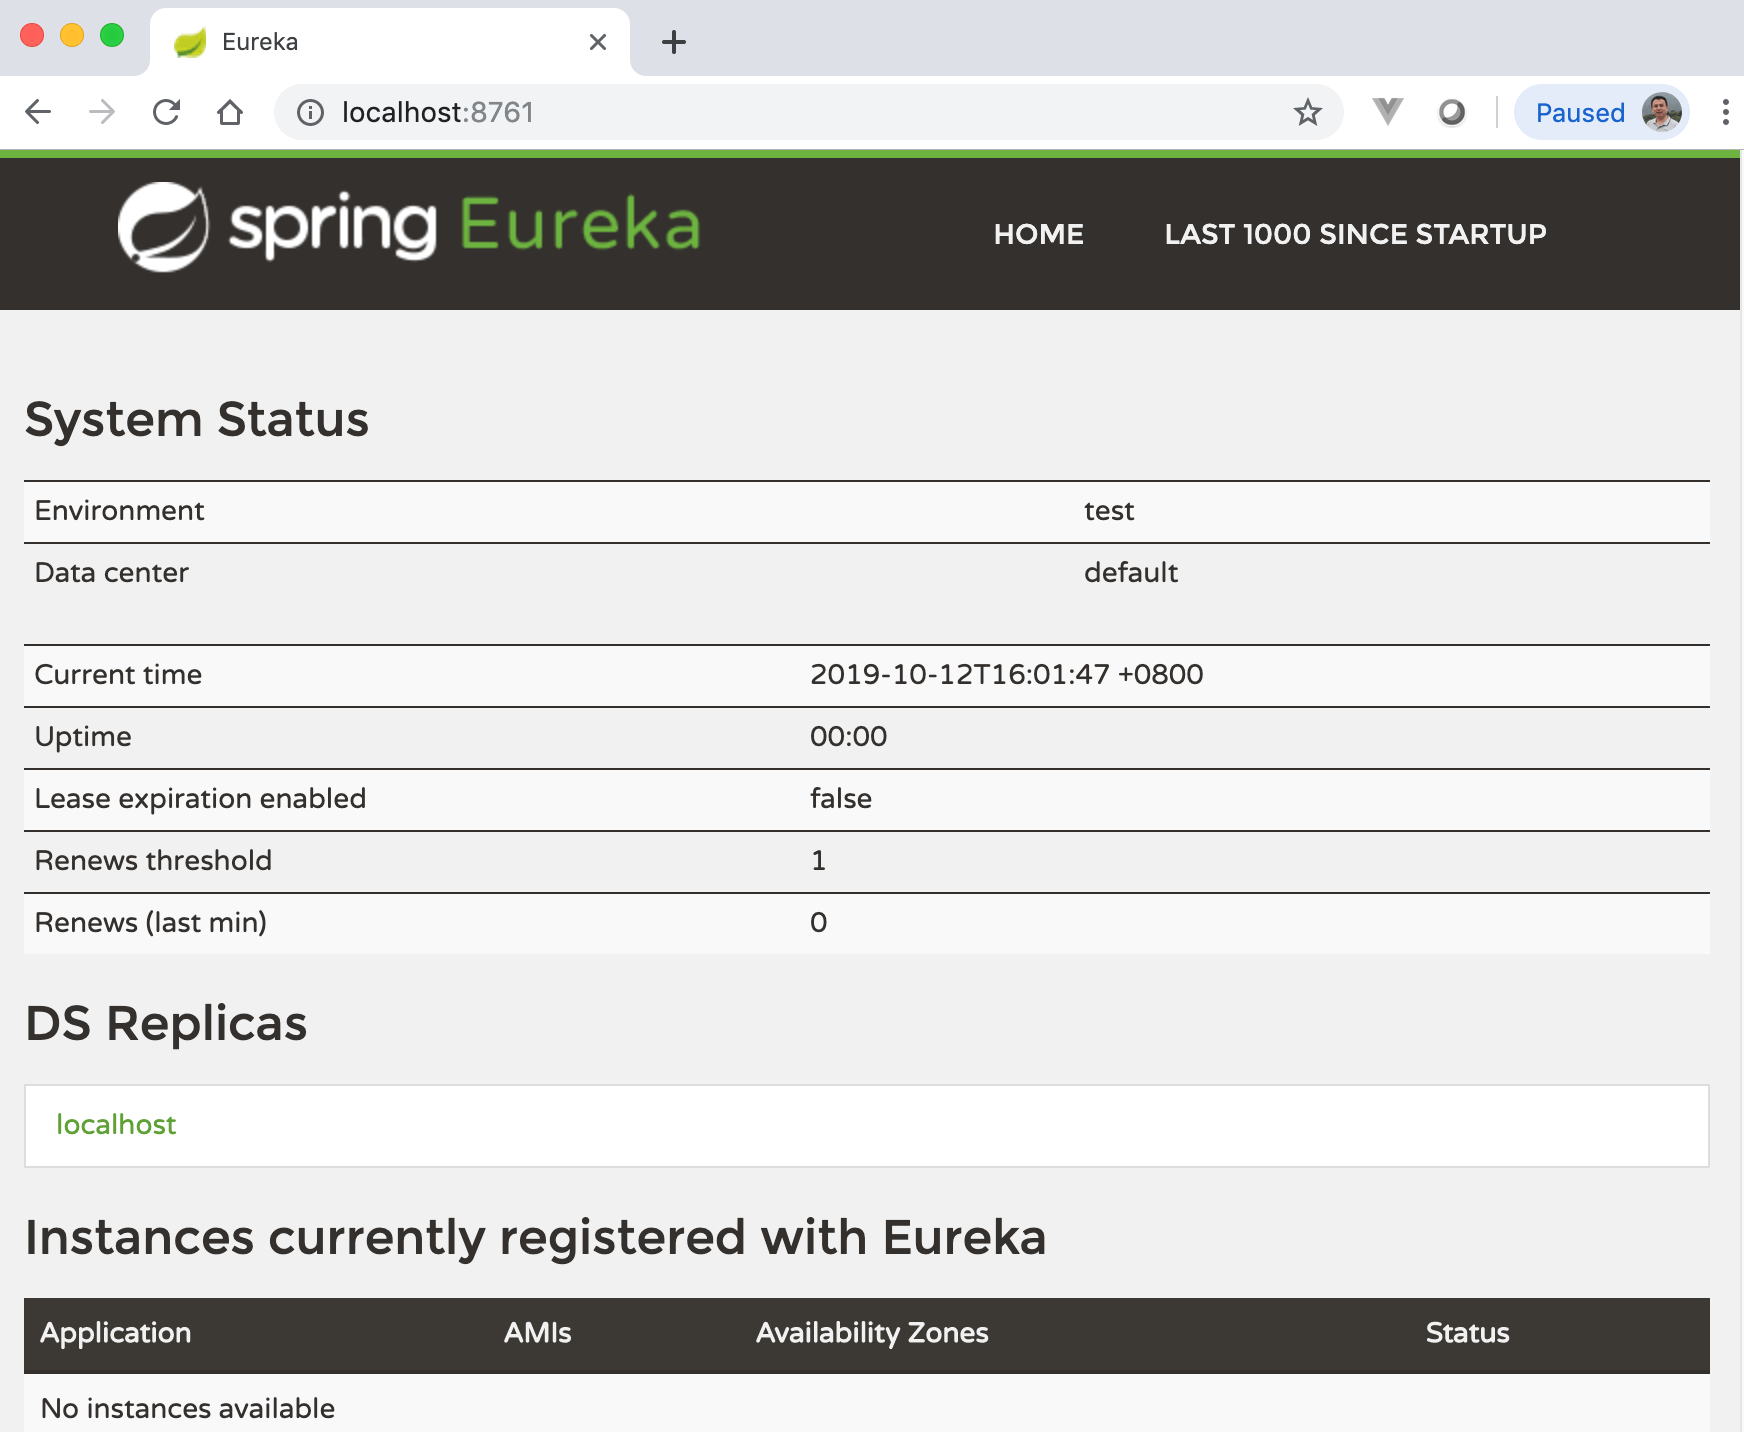
目前,我们可以看到基本指标,例如状态和健康指标。
23.2.2. Eureka Client
为了使Eureka Client能够被发现,我们必须在类路径classpath中包含一些Spring Discovery Client(例如spring-cloud-starter-netflix-eureka-client)。然后,我们需要使用@EnableDiscoveryClient或@EnableEurekaClient标签。注意,如果我们的类路径classpath具有spring-cloud-starter-netflix-eureka-client依赖项,则@EnableDiscoveryClient或@EnableEurekaClient是可选的。
注解@EnableDiscoveryClient或@EnableEurekaClient告诉Spring Boot明确使用Spring Netflix Eureka进行服务发现。
- 首先,我们将添加依赖项:
1 2 3 4 | <dependency>
<groupId>org.springframework.cloud</groupId>
<artifactId>spring-cloud-starter-netflix-eureka-client</artifactId>
</dependency>
|
- 创建RestController:
1 2 3 4 5 6 7 8 9 10 11 12 13 14 15 16 17 | package com.example.trainingeurekaclient.controller;
import org.springframework.beans.factory.annotation.Value;
import org.springframework.web.bind.annotation.GetMapping;
import org.springframework.web.bind.annotation.RestController;
@RestController
public class GreetingController {
@Value("${spring.application.name}")
private String appName;
@GetMapping("/hello")
public String hello() {
return String.format("Hello from '%s'!", appName);
}
}
|
- 添加@EnableDiscoveryClient
1 2 3 4 5 6 7 8 9 10 11 12 13 14 15 | package com.example.trainingeurekaclient;
import org.springframework.boot.SpringApplication;
import org.springframework.boot.autoconfigure.SpringBootApplication;
import org.springframework.cloud.netflix.eureka.EnableEurekaClient;
@SpringBootApplication
@EnableEurekaClient
public class TrainingEurekaClientApplication {
public static void main(String[] args) {
SpringApplication.run(TrainingEurekaClientApplication.class, args);
}
}
|
- 添加application.properties
1 2 3 4 5 6 | spring.application.name=spring-cloud-eureka-client
server.port=0
eureka.client.serviceUrl.defaultZone=${EUREKA_URI:http://localhost:8761/eureka}
eureka.instance.preferIpAddress=true
info.app.name=${spring.application.name}
|
- server.port=0 表示选择一个随机端口,因为稍后我们将使用其名称访问此服务。
- eureka.instance.preferIpAddress=true表示使用IP进行注册。
- info.app.name 表示返回healthcheck(“/actuator/info”)的内容
注解
${EUREKA_URI:http://localhost:8761/eureka},这个变量的意思是,当存在环境变量EUREKA_URI时,使用EUREKA_URI的值,如果没有的话,默认使用http://localhost:8761/eureka e.g. in production environment.
现在,我们将运行客户端,并将浏览器再次指向http://localhost:8761,以在Eureka仪表板上查看其注册状态。通过使用仪表板,我们可以进行进一步的配置,例如为了管理目的,将注册客户端的主页与仪表板链接。 但是,配置选项不在本文讨论范围之内。
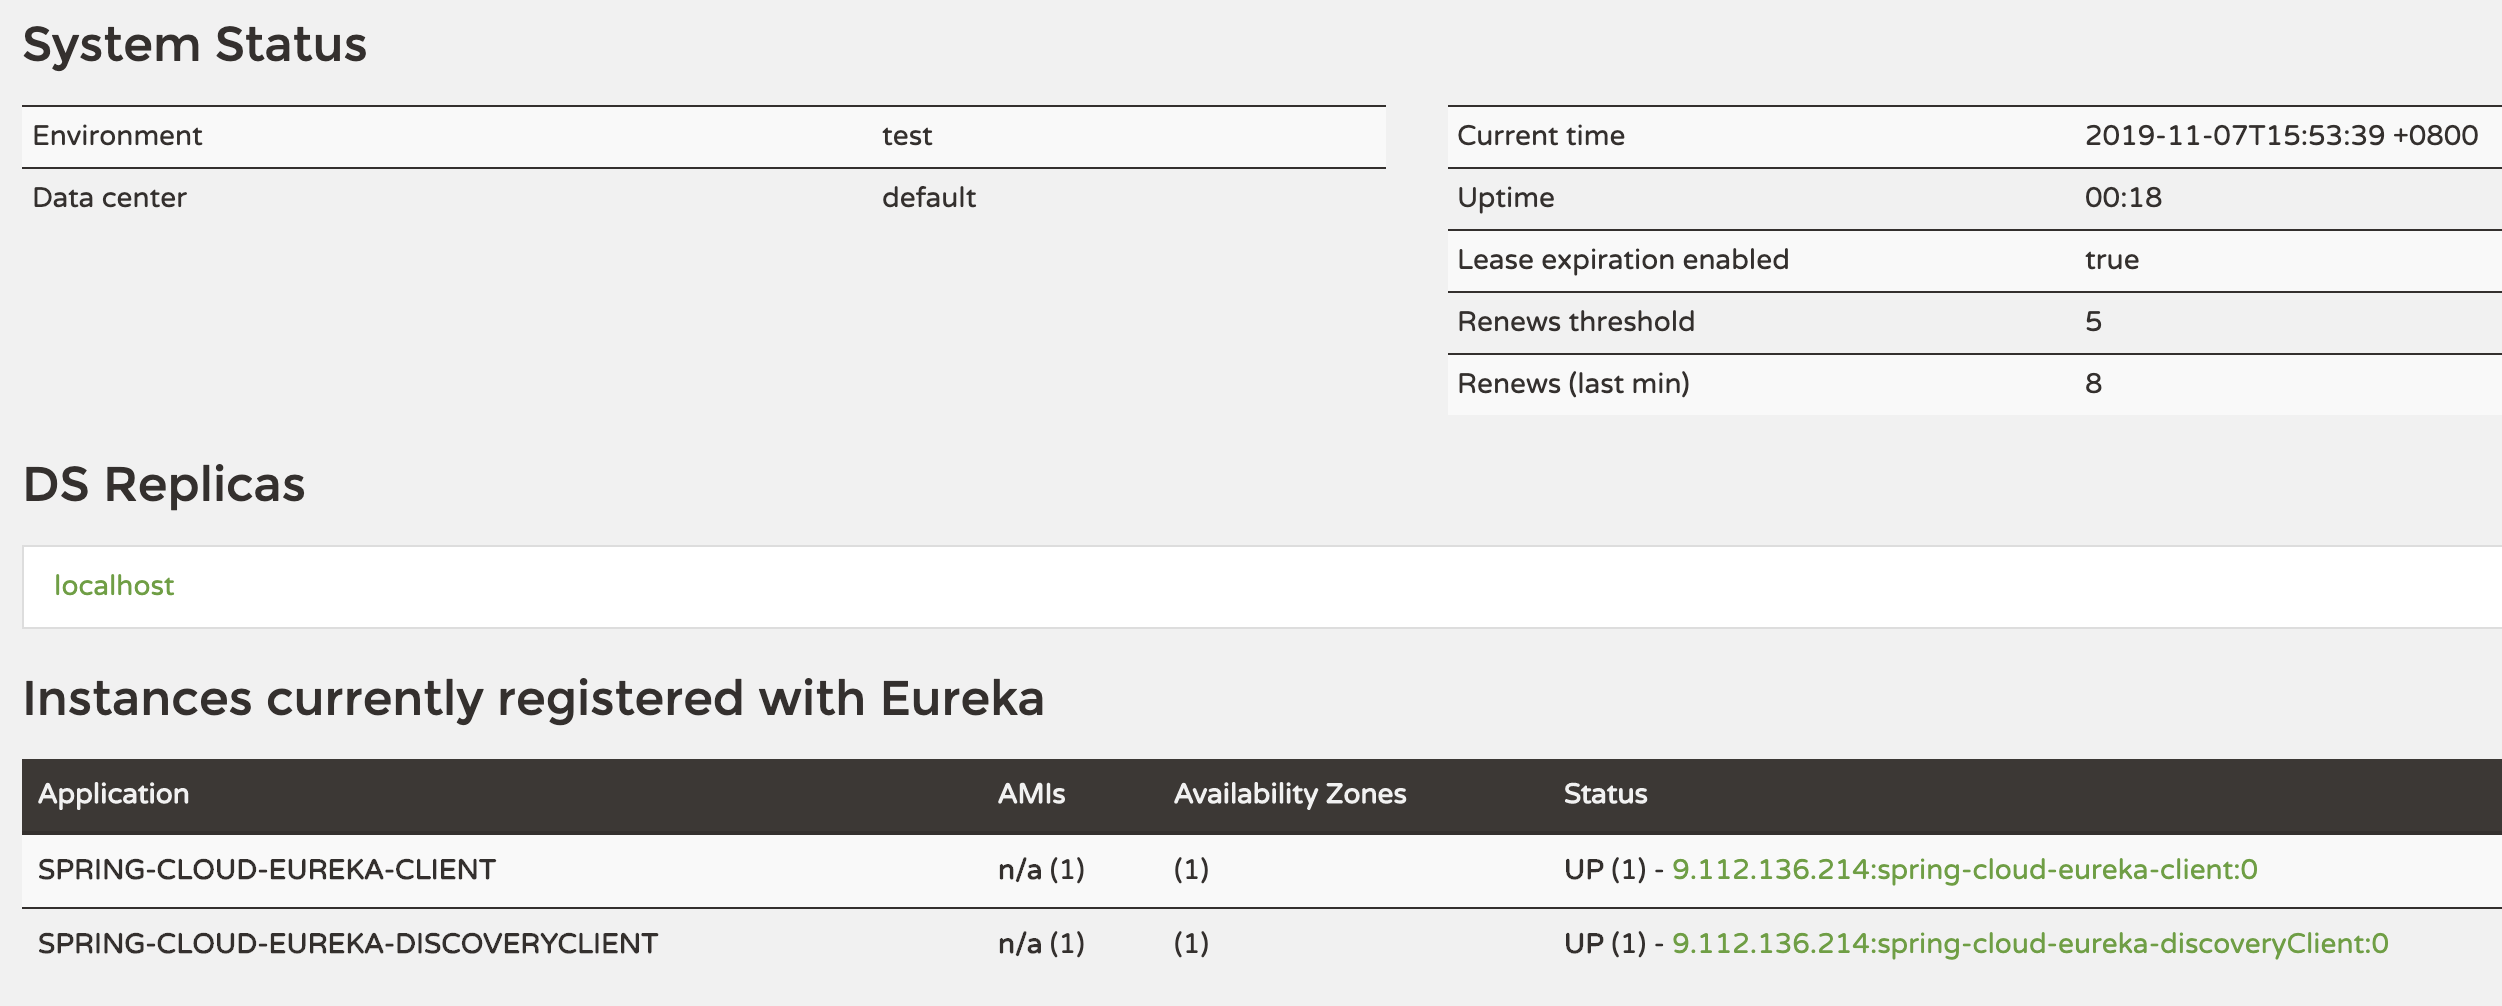
- 打开浏览器,访问地址:http://localhost:8761 查看Eureka仪表板,我们将在其中看到已经注册的实例。

- 点击仪表盘上面的Instances currently registered with Eureka区域中的link,
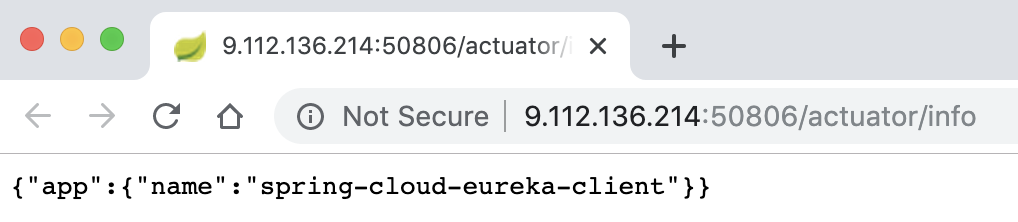
- 将url的后缀改为:/hello,将会看到下面的信息显示。

23.3. 发现REST服务
各个客户端可能需要相互访问,首先需要彼此知道对方存在,即发现REST服务,这里介绍2种实现方式。
23.3.1. EurekaClient
- Clone上面的“spring-cloud-eureka-client”项目,其中“spring.application.name”更换为“spring-cloud-eureka-eurekaClient”。
- 在GreetingController中新增一个方法,具体代码如下:
1 2 3 4 5 6 7 8 9 10 11 12 13 14 15 16 17 18 19 20 21 22 23 24 25 26 27 28 29 30 31 32 33 34 35 36 | package com.example.trainingeurekaclient.controller;
import org.springframework.beans.factory.annotation.Autowired;
import org.springframework.beans.factory.annotation.Value;
import org.springframework.context.annotation.Lazy;
import org.springframework.web.bind.annotation.GetMapping;
import org.springframework.web.bind.annotation.RestController;
import com.netflix.appinfo.InstanceInfo;
import com.netflix.discovery.EurekaClient;
import com.netflix.discovery.shared.Application;
@RestController
public class GreetingController {
@Autowired
@Lazy
private EurekaClient eurekaClient;
@Value("${spring.application.name}")
private String appName;
@GetMapping("/greeting")
public String greeting() {
Application application = eurekaClient.getApplication("spring-cloud-eureka-client");
InstanceInfo instanceInfo = application.getInstances().get(0);
String hostname = instanceInfo.getHostName();
int port = instanceInfo.getPort();
return String.format("Hello from '%s', '%s', '%s'!", application.getName(), hostname, port);
}
@GetMapping("/hello")
public String hello() {
return String.format("Hello from '%s'!", eurekaClient.getApplication(appName).getName());
}
}
|
- 代码中注入了EurekaClient实体类,我们需要延迟加载EurekaClient,因此这里使用@Lazy注解。
- 通过EurekaClient实例我们可以接收一个以service-name命名的服务信息作为Application对象。根据此对象获取该服务的所有实例的列表,选择一个合适的实例,然后使用此实例获取主机名和端口。 这样,我们可以对任何http客户端发出标准请求。
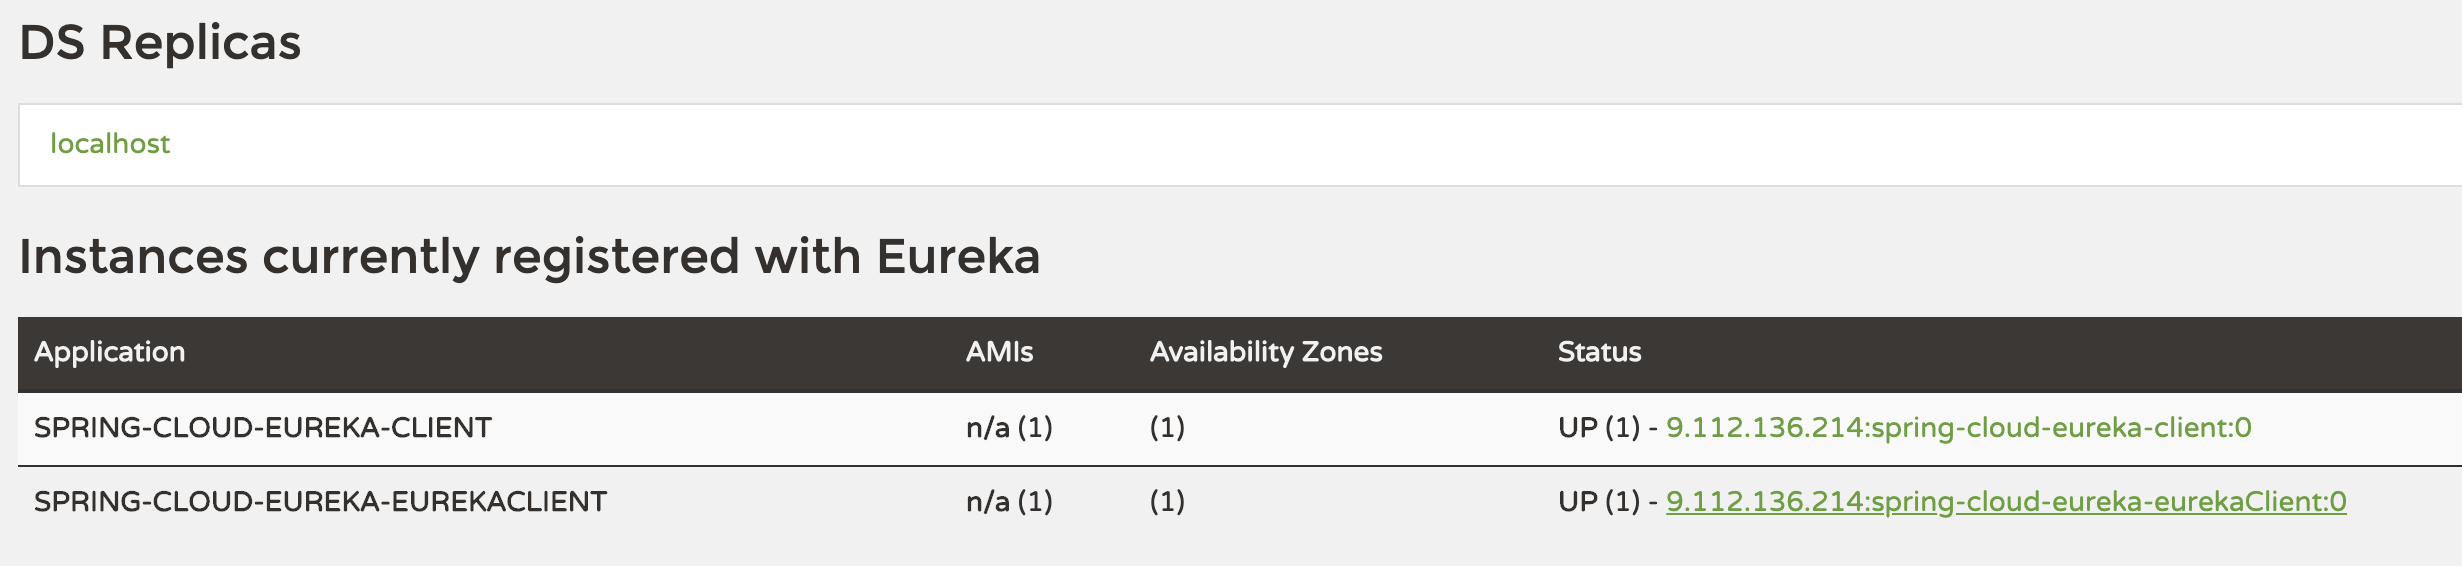
- 启动应用后,仪表板上将会新增一个实例。
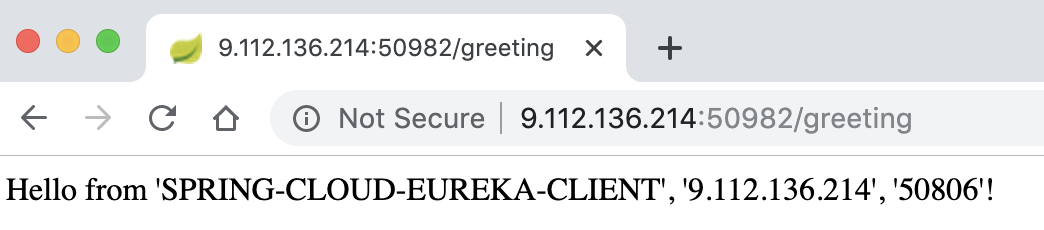
- 点击仪表盘上面的Instances currently registered with Eureka区域中的link,
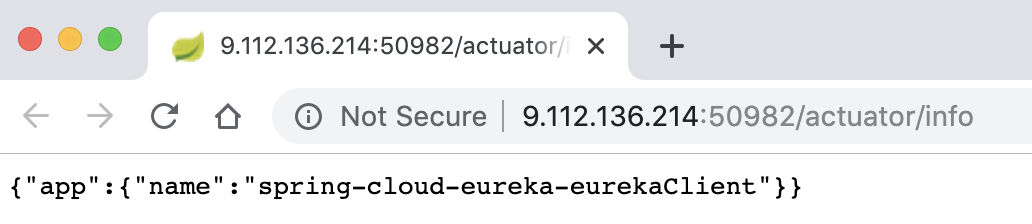
- 将url的后缀改为:/greeting,将会看到下面的信息显示。
23.3.2. DiscoveryClient
- Clone上面的“spring-cloud-eureka-client”项目,其中“spring.application.name”更换为“spring-cloud-eureka-discoveryClient”。
- 在GreetingController中新增一个方法,具体代码如下:
1 2 3 4 5 6 7 8 9 10 11 12 13 14 15 16 17 18 19 20 21 22 23 24 25 26 27 28 29 30 31 32 33 34 | package com.example.trainingeurekaclient.controller;
import java.util.List;
import java.util.Optional;
import org.springframework.beans.factory.annotation.Autowired;
import org.springframework.beans.factory.annotation.Value;
import org.springframework.cloud.client.ServiceInstance;
import org.springframework.cloud.client.discovery.DiscoveryClient;
import org.springframework.context.annotation.Lazy;
import org.springframework.web.bind.annotation.GetMapping;
import org.springframework.web.bind.annotation.PathVariable;
import org.springframework.web.bind.annotation.RestController;
@RestController
public class GreetingController {
@Autowired
@Lazy
private DiscoveryClient discoveryClient;
@Value("${spring.application.name}")
private String appName;
@GetMapping({ "/get-instances", "/get-instances/{applicationName}" })
public List<ServiceInstance> serviceInstancesByApplicationName(@PathVariable Optional<String> applicationName) {
String newName = appName;
if (applicationName.isPresent()) {
newName = applicationName.get();
}
return this.discoveryClient.getInstances(newName);
}
}
|
- 代码中注入了DiscoveryClient实体类,我们需要延迟加载DiscoveryClient,因此这里使用@Lazy注解。
- 通过DiscoveryClient实例我们可以接收一个以service-name命名的服务信息,返回该服务的所有实例的列表,选择一个合适的实例,然后使用此实例获取主机名和端口。 这样,我们可以对任何http客户端发出标准请求。
- 启动应用后,仪表板上将会新增一个实例。
- 点击仪表盘上面的Instances currently registered with Eureka区域中的link,
- 将url的后缀改为:get-instances,将会看到下面的信息显示。
1 2 3 4 5 6 7 8 9 10 11 12 13 14 15 16 17 18 19 20 21 22 23 24 25 26 27 28 29 30 31 32 33 34 35 36 37 38 39 40 41 42 43 44 45 | {
"host": "9.112.136.214",
"port": 56565,
"metadata": {},
"instanceId": "9.112.136.214:spring-cloud-eureka-discoveryClient:0",
"serviceId": "SPRING-CLOUD-EUREKA-DISCOVERYCLIENT",
"secure": false,
"uri": "http://9.112.136.214:56565",
"instanceInfo": {
"instanceId": "9.112.136.214:spring-cloud-eureka-discoveryClient:0",
"app": "SPRING-CLOUD-EUREKA-DISCOVERYCLIENT",
"appGroupName": null,
"ipAddr": "9.112.136.214",
"sid": "na",
"homePageUrl": "http://9.112.136.214:56565/",
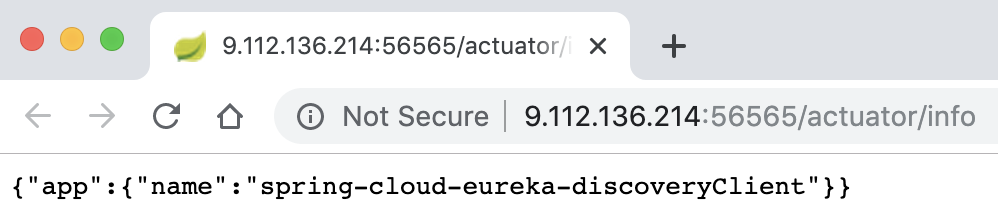
"statusPageUrl": "http://9.112.136.214:56565/actuator/info",
"healthCheckUrl": "http://9.112.136.214:56565/actuator/health",
"secureHealthCheckUrl": null,
"vipAddress": "spring-cloud-eureka-discoveryClient",
"secureVipAddress": "spring-cloud-eureka-discoveryClient",
"countryId": 1,
"dataCenterInfo": {
"@class": "com.netflix.appinfo.InstanceInfo$DefaultDataCenterInfo",
"name": "MyOwn"
},
"hostName": "9.112.136.214",
"status": "UP",
"overriddenStatus": "UNKNOWN",
"leaseInfo": {
"renewalIntervalInSecs": 30,
"durationInSecs": 90,
"registrationTimestamp": 1573113213787,
"lastRenewalTimestamp": 1573113213787,
"evictionTimestamp": 0,
"serviceUpTimestamp": 1573112678995
},
"isCoordinatingDiscoveryServer": false,
"metadata": {},
"lastUpdatedTimestamp": 1573113213787,
"lastDirtyTimestamp": 1573113213225,
"actionType": "ADDED",
"asgName": null
},
"scheme": null
}
|
23.5. 负载平衡
- 我们以工程“spring-cloud-eureka-discoveryClient”为例,换个不同的端口,再部署一个,仪表板显示如下:
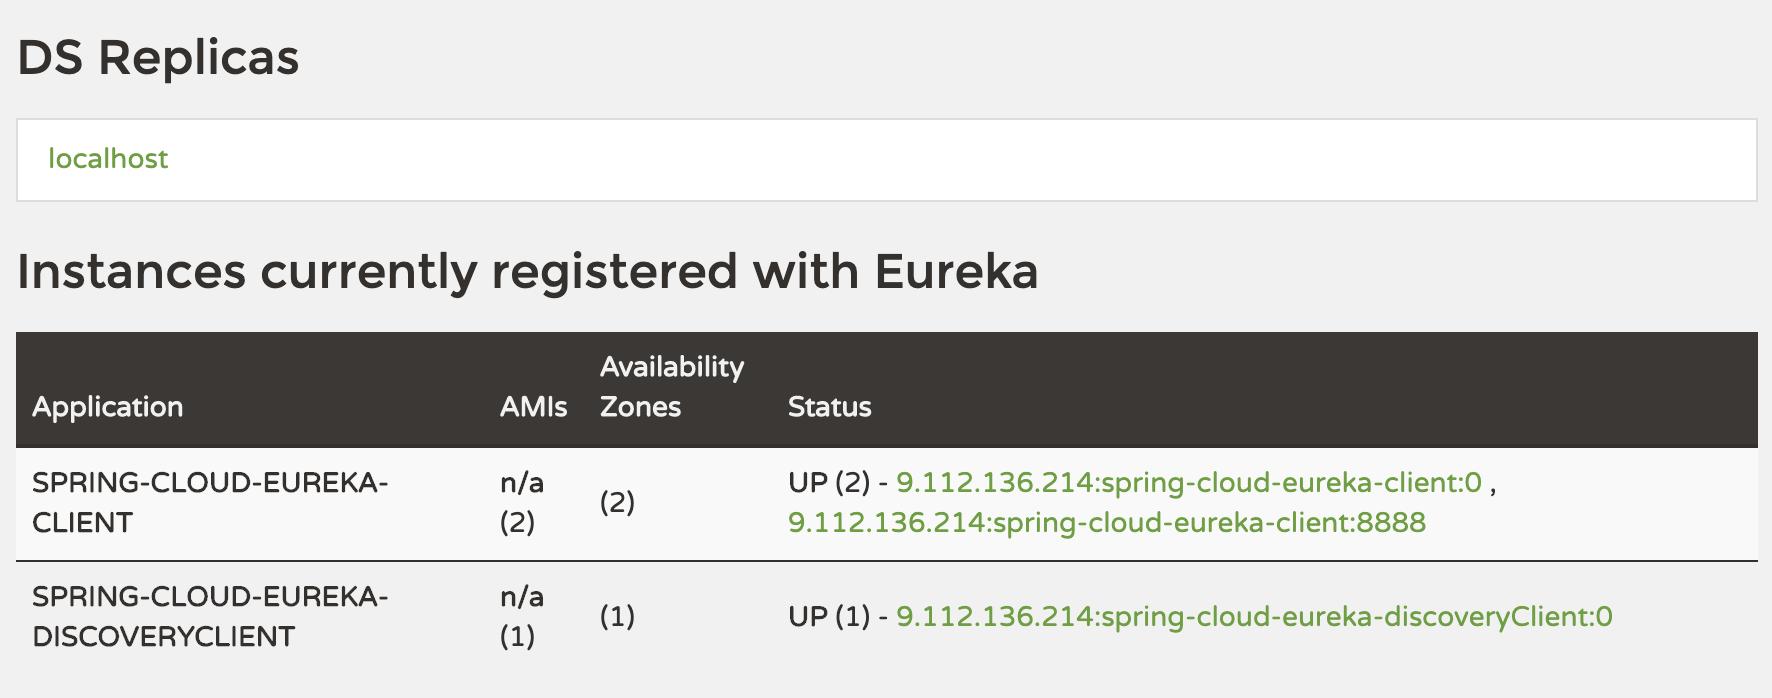
- 点击仪表盘上面的Instances currently registered with Eureka区域中的link,然后将url的后缀改为:get-instances,将会看到下面的信息显示。
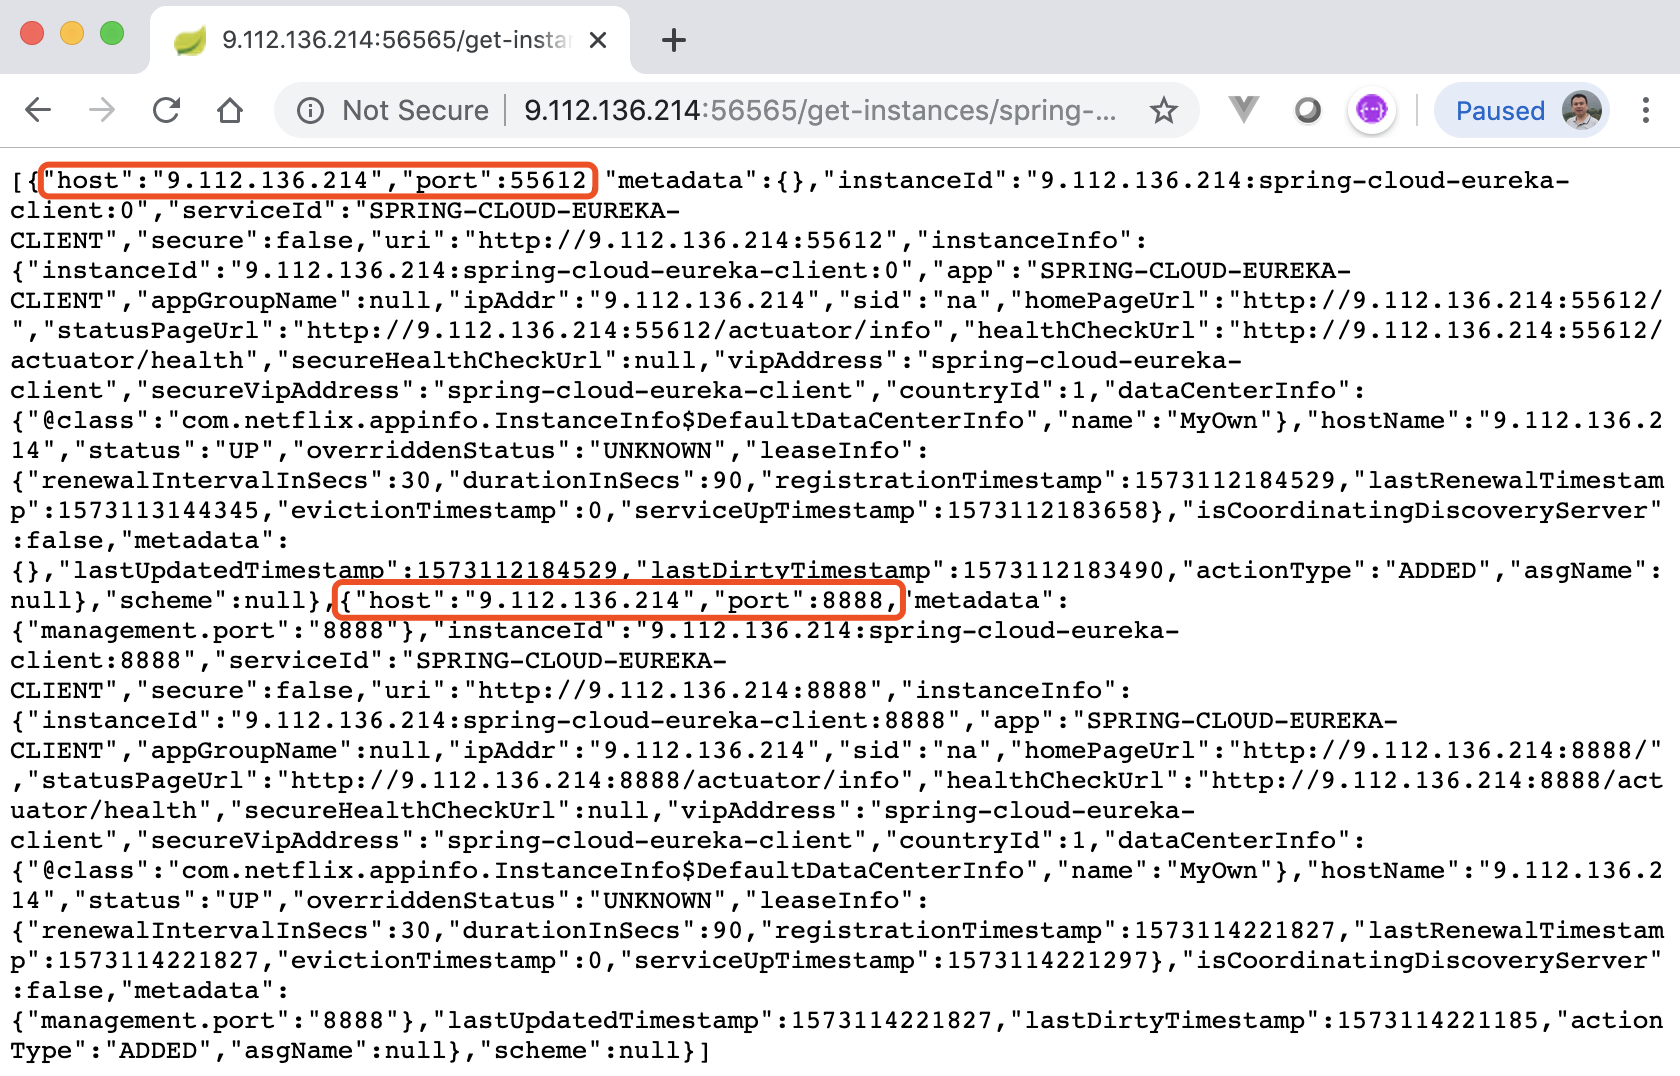
上图显示了2个实例信息。
下面示例演示@LoadBalanced注解,它提供负载均衡功能。
1 2 3 4 5 6 7 8 9 10 11 12 13 14 15 16 17 18 19 20 21 22 23 24 25 26 27 28 29 30 31 32 33 34 35 36 37 38 39 40 41 42 43 | package com.example.trainingeurekaclient.controller;
import org.springframework.beans.factory.annotation.Autowired;
import org.springframework.beans.factory.annotation.Value;
import org.springframework.cloud.client.loadbalancer.LoadBalanced;
import org.springframework.context.annotation.Bean;
import org.springframework.context.annotation.Lazy;
import org.springframework.web.bind.annotation.GetMapping;
import org.springframework.web.bind.annotation.RestController;
import org.springframework.web.client.RestTemplate;
import com.netflix.discovery.EurekaClient;
@RestController
public class GreetingController {
@Autowired
@Lazy
private EurekaClient eurekaClient;
@Value("${spring.application.name}")
private String appName;
@LoadBalanced
@Bean
RestTemplate restTemplate() {
return new RestTemplate();
}
@Autowired
RestTemplate restTemplate;
@GetMapping("/greeting")
public String greeting() {
String greeting = this.restTemplate.getForObject("http://spring-cloud-eureka-client/greeting", String.class);
return String.format("%s, %s!", greeting, appName);
}
@GetMapping("/hello")
public String hello() {
return String.format("Hello from '%s'!", eurekaClient.getApplication(appName).getName());
}
}
|